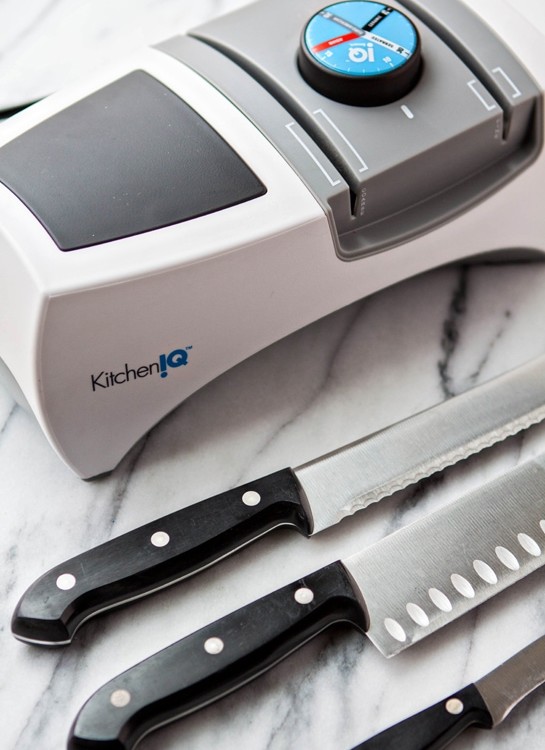
How to Use an Electric Knife Sharpener
Using an electric knife sharpener might seem like a daunting task to the home cook. Once you get the hang of it, you’ll love how easy it is to transform your dull knives into like new knives with sharp blades. Read on to learn how to use an electric knife sharpener along with tips and tricks for the process.
This post may include affiliate links. As an Amazon Associate and member of other affiliate programs, I earn a small commission from qualifying purchases.
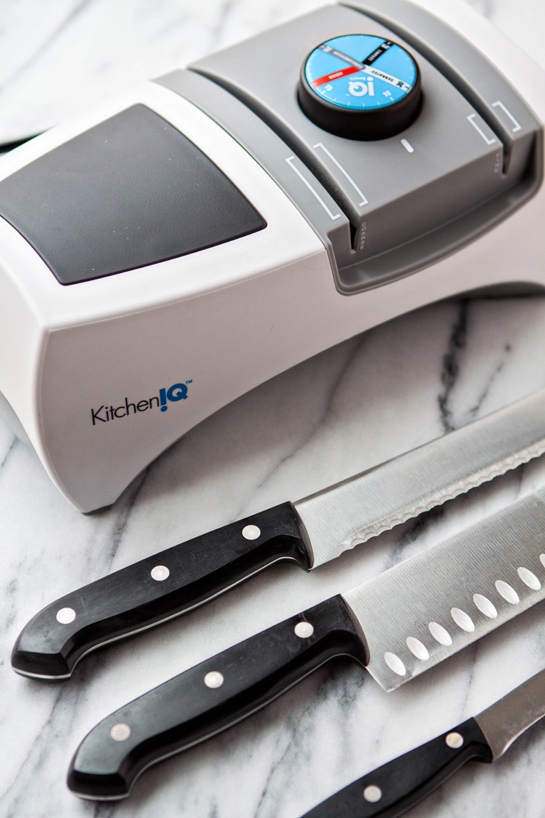
Testing This Electric Knife Sharpener
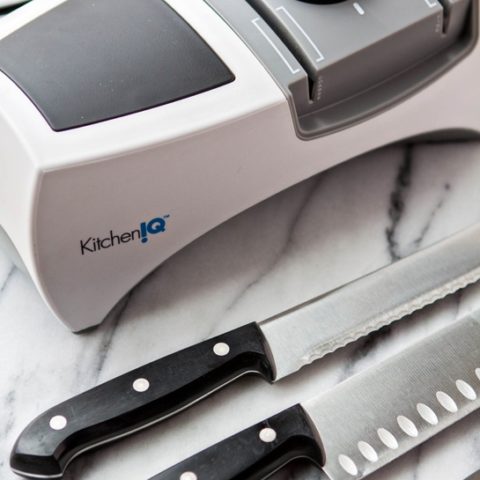
When Food Fanatic and KitchenIQ asked me to test out their new KitchenIQ Smart Sharp Electric Knife Sharpener, I was super excited – my knives are SO DULL and haven’t really been sharpened properly in a long time…errrrr… years? Or ever?
I have been thinking for months that I should find somewhere to take my knives to get sharpened, so this was a great opportunity to renew my dull blades and learn how to do sharpen knives myself.
If you spend significant time cooking, you’ve probably heard how dangerous it is to use dull knives. If you haven’t heard that, you might be wondering: “Why? Wouldn’t a sharper knife cut worse?” Not exactly.
A dull knife doesn’t cut as easily as a sharp knife. It isn’t precise, causing the knife to slip and the cook to lose control while cutting, often putting hands and fingers in harm’s way!
I once spent the evening getting a finger stitched in the ER courtesy of a dull knife. It is no fun, folks.
Pros and Cons of Electric Knife Sharpeners
Trying to decide if investing in an electric knife sharpener is right for you? Here are some of the pros and cons of this method to help you determine what’s best for you:
Pros of Using an Electric Knife Sharpener
- Very little skill is required. Sharpening your kitchen knife set is quick and easy once you understand the process.
- They’re very good at sharpening exceptionally dull knives.
- The slots help you use the correct angle to sharpen.
- Not quite at the level of professional results, but really good results at home without dropping your knives off somewhere.
Cons of Using an Electric Knife Sharpener
- You need to accurately follow your model’s instructions so you don’t risk damaging your knife.
- Electric knife sharpeners are another appliance to store.
- They’re more expensive than manual knife sharpeners, whetstones, or sharpening rods.
- Electric knife sharpeners are very loud.
The main drawback for me was the noise and the storage. Neither were deal breakers because I have plenty of space, though. So, ultimately I decided owning this extra appliance was a great way for me easily to keep a sharp edge on my knives.
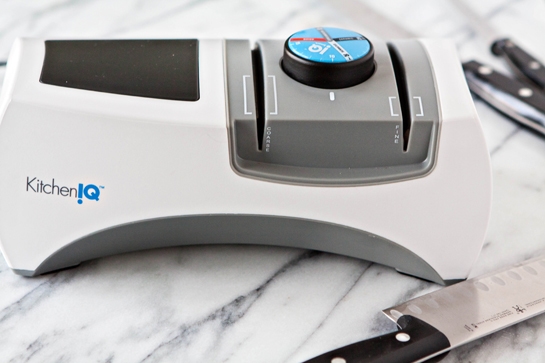
Quick Start Guide to Using this Electric Knife Sharpener
Because I like having my own quick start guide to refer back to upon each repeated use, I’ve created this easy knife sharpening guide to serve as a refresher after the initial manual reading.
- Plug the unit in.
- Dial to 10.
- Dial to your selected knife style.
- Turn the unit on. Don’t move the dial when the machine is on.
- Proceed with sharpening process.
- Turn the unit off after completing a sharpening procedure on a knife.
Note: You should always read the user manual before operating any new kitchen appliance. This guide is not meant to be all inclusive, but rather a simple overview of the process of knife sharpening using an electric sharpener. Follow all safety protocols and instructions specific to your model for best results.
How to Use an Electric Knife Sharpener
Before starting, consult your user manual, as some electric knife sharpeners may have a slightly different procedure, safety precautions not listed here, or use different terminology.
- Place the electric knife sharpener on a flat surface, such as a kitchen with plenty of counter space. When handling sharp objects, you want to make sure the knife sharpener is stable so you don’t inadvertently cut yourself.
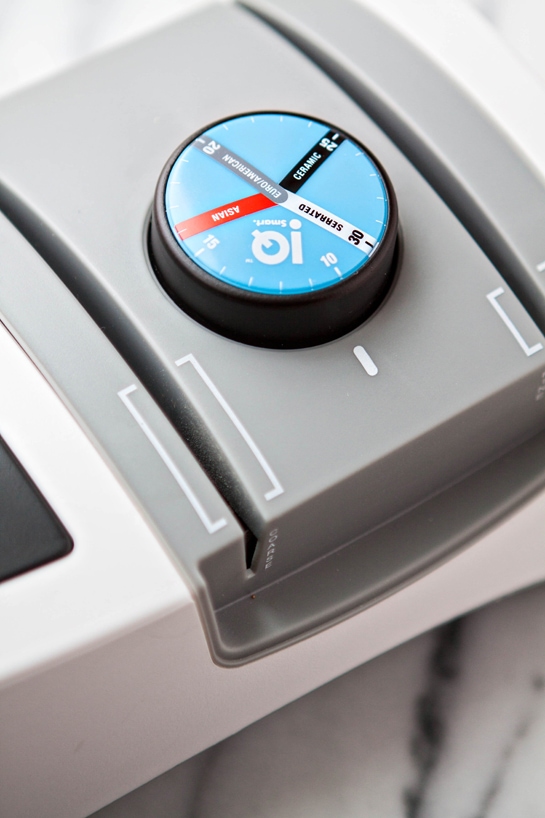
- Dial to your selected knife style. My electric sharpener gives different blade types – Asian Knives, Ceramic Knives, Euro/American Knife, Serrated Knife
- Prepare for Sharpening. Depending on your knife, it can be a two-stage process. Start with the coarsest sharpening position, especially if you haven’t sharpened your knives in a while. A dull knife will need to be sharpened on the coarse stage first (sometimes called the first stage). If you sharpen your knives on a regular basis, then your knife is likely only in need of a touch up OR a serrated knife, fine stage sharpening is all you will do (skip to step 6).
- Start the Coarse Sharpening: Turn the sharpener on. When placing the knife into the coarsest slot of the sharpener, push the heel of the blade straight down into the slot. Using your dominant hand, pull the blade of the knife straight out, from heel to tip, following the curve of the knife’s blade. You will need to pull the blade through 10-15 times (5-10 for serrated).
- Remove the Blade from the Slot. When removing the blade from the slot, do not pull it all the way out. Rather, lift it straight up once you get to the tip.
- Start the Fine Sharpening: After the coarse sharpening, repeat the same process with the fine sharpening slot, pulling the blade through this 10-15 times.
- Remove the Blade fro the Slot. When removing the sharp blade from the slot, do not pull it all the way out. Rather, lift it straight up once you get to the tip.
- Wash and Dry the Knife. Power down your sharpener when finished. Then, after the power is off, wash your knife to remove any metal debris. Dry with a clean towel. Test your knife’s sharpness by performing the paper test.
Testing a Knife’s Sharpness
After following the above instructions, it is best to test your knife’s sharpness to see if your sharpening was sufficient. In the case of very dull knives, you may need to repeat the whole process if you find your knife isn’t as sharp as you’d like it.
Perform the Paper Test to Check the Knife Blade
- Fold a smooth piece of paper in half (a newspaper or a piece of printer paper is great for this!).
- Carefully place the knife against the crease and slice downwards.
- If the paper slices cleanly with no jagged edges, the knife is properly sharpened. If the knife edge look jagged, it’s time to sharpen the knife.
Knife Sharpening Tips
- For this particular sharpener, you will always redial back to 10 before navigating to your sharpening angle. This is like resetting to zero on your old school locker combination. For example, if you’re sharpening an Asian style knife, dial back to 10 before switching to something else, serrated for instance.
- Serrated knives are only sharpened in the FINE slot and should not be placed in the COARSE sharpening slot. You will perform only 5-10 pulls on serrated knives.
- NEVER push and pull the knife back and forth in a sawing motion within the sharpening slot.
- If your knives are damaged or very dull, start your sharpening on the COARSE slot, unless it is a serrated knife.
- For regularly sharpened knives, you can skip the COARSE slot and performed maintenance sharpening on the FINE slot only. This is great if you spend a few minutes weekly, or even monthly, sharpening your knives.
- You might encounter sparks. You will definitely encounter noise and vibration.
My Thoughts on Using this Electric Knife Sharpener
Overall, I was thrilled with the performance of the Kitchen IQ Smart Sharp Electric Knife Sharpener.
I thought it was a quality electric knife sharpener. It is definitely one of those kitchen tools that you never think to buy, but once you have it you can imagine not owning it. I loved all of the different options that accommodated the variety of knives in one electric tool.
My sharp knives cut so much better now – I did a few before and after test cuts and WOW the difference! It was incredibly noticeable on the tomatoes, which cut like butter post-sharpening.
The user manual was a bit of a beast to read, but totally necessary and informative. It gave me a better understanding of the process of using an electric sharpener. Now that I’ve done this a few times it is a really easy process.
More Useful Knife Skills:
Learn How to Sharpen Kitchen Knives correctly when you check out my step by step guide for 4 methods, including manual sharpeners, honing rods, and whetstones. I also include instructions for ceramic and serrated knives.
Chocolate curls are easy to make, and they add a touch of elegance to any cake, cupcake, trifle, or cheesecake! In this post, I’ve provided step-by-step instructions on How to Make Chocolate Curls, plus I’m sharing the different types of chocolate to use for chocolate curls, how to store the curls, and more!
Learn how to supreme an orange with this simple tutorial! Learning simple knife skills, like supreme cuts, will enhance the look of your citrus dishes.
Don’t waste any part of that fresh pineapple! This post shares how to cut a pineapple six different ways, as well as ideas for using the pineapple top and tough skin.
Learn how to cut an avocado quickly — and safely! — using this guide. You’ll also learn how to store cut avocado, how to peel an avocado, and the many ways to use avocados!
Stay Inspired in the Kitchen!
Want more delicious recipes, kitchen tips, and meal inspiration? Sign up for the Good Life Eats Newsletter and get:
✔ Tried-and-true recipes—from quick weeknight meals to special occasion favorites.
✔ Seasonal meal ideas—helping you make the most of fresh, in-season ingredients.
✔ Time-saving kitchen tips—boosting your confidence and creativity in the kitchen.
How to Use an Electric Knife Sharpener
Using an electric knife sharpener might seem like a daunting task. Once you get the hang of it, you’ll love how easy it is to transform your dull knives into like new knives with sharp blades.
Materials
- Dull Knives
- Level and Stable Work Surface
- Kitchen Towel, for drying
Tools
- Electric Knife Sharpener
Instructions
Before starting, consult your user manual, as some electric knife sharpeners may have a slightly different procedure, safety precautions not listed here, or use different terminology.
Getting Started
- Place the electric knife sharpener on a level surface, such as a kitchen counter. When handling sharp objects, you want to make sure the knife sharpener is stable so you don’t inadvertently cut yourself.
- My electric sharpener gives the options of Asian, Euro/American, Ceramic, and Serrated. Choose the appropriate categorization.
- Determine what type of sharpening you'll do: coarse and fine sharpening, or only fine sharpening.
- Coarse is for very dull or damaged knives. After coarse, you'll follow with fine.
- Fine sharpening alone is for recently sharpened knives or serrated knives.
For Coarse Sharpening
- Turn the sharpener on. When placing the knife into the sharpener, push the heel of the blade straight down into the slot. Pull the blade straight out, from heel to tip, following the curve of the knife’s blade. You will need to pull the blade through 10-15 times (5-10 for serrated).
- Remove the Blade from the Slot. When removing the blade from the slot, do not pull it all the way out. Rather, lift it straight up once you get to the tip.
For Fine Sharpening
- After the coarse sharpening, repeat the same process with the fine sharpening slot, pulling the blade through this 10-15 times.
- When removing the blade from the slot, do not pull it all the way out. Rather, lift it straight up once you get to the tip.
Cleaning the Knife
- Power down your sharpener when finished. Then, after the power is off, wash and dry your knife to remove any metal debris. Test your knife’s sharpness by performing the paper test.
Notes
Perform the Paper Test to Check the Blade
- Fold a smooth piece of paper in half (a newspaper or a piece of printer paper is great for this!).
- Carefully place the knife against the crease and slice downwards.
- If the paper slices cleanly with no jagged edges, the knife is properly sharpened. If the knife edge look jagged, it’s time to sharpen the knife.
Recommended Products
As an Amazon Associate and member of other affiliate programs, I earn from qualifying purchases.








Leave a Comment