
How to Freeze Cherries
Freezing fresh cherries is the perfect way to take advantage of sale prices and enjoy the taste of summer all year round! Here’s How to Freeze Cherries, plus my top tips for thawing frozen cherries and the many ways to use them in recipes.

Can You Freeze Fresh Cherries?
If you’re an avid smoothie drinker or love making cherry pies, chances are good that you’ve noticed cherries in the frozen fruit section of your local grocery store before.
Did you know that you can easily freeze fresh cherries yourself in the summer? Store-bought frozen cherries just don’t taste as vibrant as fresh cherries that you freeze yourself, what can I say!
Plus, purchasing and freezing cherries in bulk during the season is less expensive than purchasing outside of the growing season.
Frozen cherries can be used in smoothies, compotes, and jams, but they can also be added straight into crisps, cobblers, pies, and more — so long as you pit the cherries first, that is! (More on freezing cherries with and without the pit later in this post.)
This post will explain how to freeze cherries, when you should thaw frozen cherries and how to do so, and I’ll also share my top tips for avoiding freezer burn.
When Are Cherries in Season?
Cherries are one of the few supermarket fruits that aren’t available year round, so it’s crucial to stock up on them while they last! Different varieties of cherries have slightly different growing seasons, so mark your calendar so you don’t forget to buy in bulk.
- Sweet cherries, like Bing and Rainier, are available May to August, with June and July being the peak of the season.
- Tart cherries, like Montmorency and Morello, have a shorter growing season; they’re only available for a couple weeks near the end of June.
What Are the Most Common Types of Cherries?
There are many more varieties of cherries than I’ve listed below, but the most common kinds you’ll see in the US are as follows:
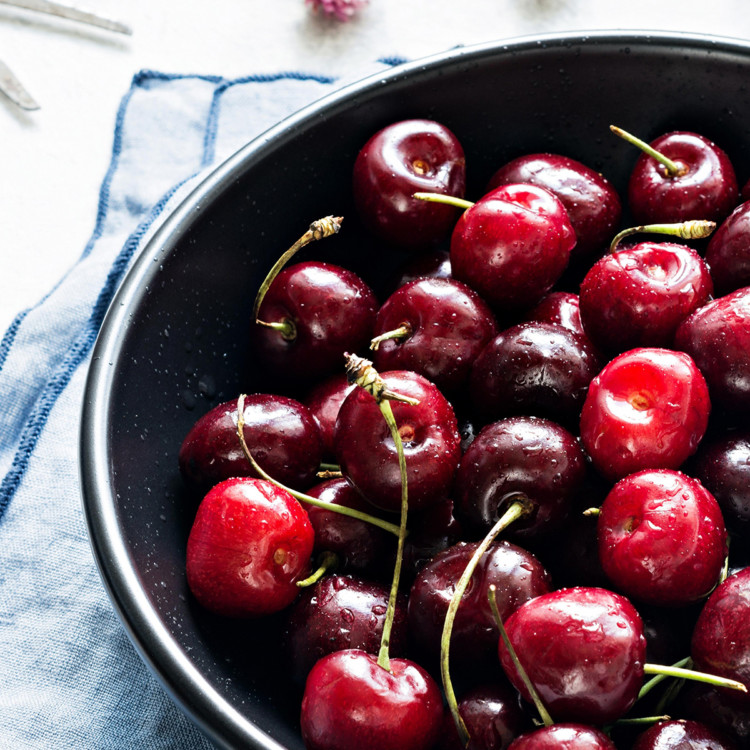
- Bing cherries — Most common in the US. These are sweet, dark cherries that are great for snacking.
- Rainier cherries — Another sweet cherry that are great for snacking. They’re easy to identify thanks to their bright yellow and red coloring.
- Montmorency cherries — The most popular tart cherry variety in the US. They’re great for baking and are best in pies.
- Morello cherries — Sometimes called “pie cherries.” This variety is incredibly tart and dark red in color. You’re more likely to find these at the farmers market than at the grocery store.
Tools Needed for Freezing Cherries
You’ll need just a few kitchen tools to freeze fresh cherries. I recommend having the following on hand:
- Large Baking Sheet — I recommend using a rimmed baking sheet so none of the cherries accidentally slide off.
- Parchment Paper — You must line the baking sheet to prevent the cherries from sticking to it.
- Container or Bag for Freezing — I explain the best freezer containers in the section below.
- Paring Knife — My preferred tool for pitting cherries prior to freezing. You may also use a cherry pitter.
- Permanent Marker — For labeling the freezer bag or container.
- Optional: Vacuum Sealer and Vacuum Bags — My preferred freezing method for avoiding freezer burn.
What Containers Should I Use to Freeze Fresh Cherries?
There are a few different containers that work for storing flash frozen cherries — plastic freezer bags, silicone bags, vacuum seal bags, and freezer-safe storage containers.
I’ll review the pros and cons of each container below, but when making your selection you need to consider how much freezer space you have available, how long you wish to store cherries in the freezer, and what type of freezer containers and material you prefer for storing food.
Option 1: Plastic Freezer Bags
A gallon plastic freezer bag is typically my go-to when it comes to storing frozen fruit. They’re easy, quick, and I usually have them on hand.
- PROS: Easy to reseal if you dig into your stash of cherries regularly or find yourself using a bit at a time. For storing smaller amounts, use quart-sized freezer bags.
- CONS: Single use, usually. They can be washed, dried, and reused, however, but eventually get damaged and end up in the trash. Ziploc bags also don’t remove as much air as vacuum sealers.
Option 2: Silicone Bags
Available in a wide range of sizes (and colors) up to 104 fl. ounces. I like Stasher Bags, but there are a variety of brands on the market.
- PROS: Convenience and ease of a plastic freezer bag. Eco-friendly. Silicone Bags don’t develop micro-tears or damage as easily as plastic freezer bags do. Reseal easily for using small amounts of frozen cherries at a time.
- CONS: They’re more expensive, but the cost is potentially offset over time by their durability and reusable nature.
Option 3: Vacuum Seal Bags
We have a vacuum sealer and I love it! For long term storage, vacuum sealing gives the best results. Ideal for when you know you’re going to use the entire bag at once.
- PROS: This is the best way to freeze cherries if you want them to last for a long time because all of the air is removed from the bag. You’ll also maximize storage space. Bag size can be customized.
- CONS: If you plan on using frozen cherries frequently, this storage method isn’t ideal because they don’t reseal quickly. You’d also have to purchase a vacuum sealer if you don’t own one.
Option 4: Storage Containers
I like Snapware, which comes in glass or plastic, if I plan to use a freezer-safe container. I don’t often use them for freezing fruit, because of the cons. But, this type of food storage container is great for freezing soup.
- PROS: Reusable and available in a variety of shapes and sizes. You can reuse glass jars you already have as long as the glass is freezer-safe.
- CONS: Takes up the most amount of space in the freezer. If you use glass, there is always the risk of it breaking.
How to Prep Cherries for Freezing
Before freezing fresh cherries, you need to remove any excess dirt and also remove any that have gone too soft or moldy for freezing.
You may also pit the cherries, if desired (which is what I recommend doing to make using the frozen cherries later on much easier!).
Step 1: Clean the Cherries
At minimum, fresh cherries need a really good rinsing with tap water before freezing. If you want a deeper clean, here are my two favorite methods:
- Branch Basics is my favorite non-toxic cleaner for washing produce. (Use code KATIEGLE for 15% off Branch Basics Products). Spray fruit with All-Purpose Cleaner, let soak for 2 to 3 minutes, then rinse thoroughly with cold water.
- DIY cleaning solution for cherries using 1/2 cup vinegar per 3 cups water. Let the berries soak in a large bowl of the solution for 2 to 3 minutes. Then, give them a good rinse.
Step 2: Dry the Cherries
Cherries need to be completely dried after cleaning for best results, or they can develop freezer burn. I like to lay them on a dry, clean dish towel after draining them and let them air dry.
Step 3: Pit the Cherries (Optional)
Pitting cherries before freezing them is optional, but I highly recommend removing the pits! By pitting the cherries prior to freezing them, you’ll be able to use them in future recipes without having to thaw and pit them first.
If you freeze cherries with the pits in them, you’ll have to thaw and pit them one-by-one in the future.
Here’s how to pit cherries using a paring knife:
- Carefully work a paring knife around the flesh of the cherry, like you would to cut a peach in half.
- Twist the two halves of the cherry apart.
- Pluck the cherry pit out with your fingers.
Tip: A paring knife is just one method for pitting cherries. Here are the many other ways to pit cherries — use whichever method is easiest for you!
How to Freeze Cherries (With or Without the Pit!)
I love freezing cherries for future baking projects, smoothies, and slushies. To freeze fresh cherries, do the following:
- Rinse and dry the cherries thoroughly, as instructed in the section above.
- Pit the cherries using whichever method is easiest for you. This step is optional, but highly recommended. If not pitting the cherries, skip this step and leave them whole.
- Lay the cherries in a single layer on a parchment-lined baking tray (tip: How to Line Pans with Parchment Paper). Cherries should be in a single layer so they don’t freeze in a big clump.
- Freeze until hard, about 1 hour.
- Transfer the cherries to your preferred freezer bag or freezer container.
- Label, date, and freeze for up to 1 year.
Can You Freeze Cherries With the Pits?
Yes, you can freeze fresh cherries with the pits inside! Freezing cherries with the pits doesn’t affect the freezing process or texture of the fruit at all.
However, cherries that have been frozen with the pits inside MUST be thawed before using them. That’s because the frozen cherries need to have the pits removed before they can be eaten.
Theoretically I’m sure there’s a way to remove cherry pits from frozen cherries, but I imagine the process would be arduous. As such, you’ll have to thaw, pit, and then use the frozen cherries.
How Long Do Frozen Cherries Last in the Freezer?
Frozen fresh cherries will last up to 1 year in the freezer. If you plan on freezing the cherries for that long, I recommend using vacuum freezer bags for best results.
Do Frozen Cherries Go Bad?
Frozen cherries don’t really spoil, per se. Longer storage just increases the potential for freezer burn. They’ll become less fresh over time, and you’ll notice more formation of ice crystals.
If your cherries have developed freezer burn, they are still safe to eat but the texture may be compromised. In that case, toss them into smoothies or cook them down to make a compote so they don’t go to waste!
How to Thaw Frozen Cherries
You have a few options when it comes to thawing frozen cherries. Choose whichever method is best for you depending on how much time you have.
Option 1: Thawing Cherries on the Counter
- Measure out the amount of frozen cherries you’d like to use.
- Place them in a bowl or baking dish.
- Pour cold tap water into the bowl, just until the cherries are covered.
- Let the cherries sit on your counter at room temperature until fully thawed, about 10 minutes.
- If the cherries haven’t thawed after 10 minutes, drain the water and replace with fresh tap water. The exact amount of time required to thaw frozen cherries this way will depend on how many are in the bowl.
- Once thawed, pat the cherries dry with a clean kitchen towel and proceed with the recipe as instructed.
Option 2: Thawing Cherries in the Microwave
- Place the desired amount of frozen cherries in a microwave-safe bowl that’s been lined with paper towels (this helps soak up the excess moisture from the cherries).
- Using the “Defrost” setting of your microwave, microwave the cherries for 30 seconds.
- If they’re not fully thawed by that point, continue microwaving them on the defrost setting for 10-second intervals.
Option 3: Thawing Cherries in the Fridge
- Measure the desired amount of frozen fresh cherries into a bowl or sealable container.
- Place the cherries in the fridge overnight, or for about 6 hours.
- In the morning, the cherries will be thawed and ready to use!
Should You Thaw Frozen Cherries Before Using Them?
Unthawed frozen cherries often won’t cook fully if used in a recipe with a short cooking time, like pancakes or waffles. In those instances, thawing first is always a good idea! Otherwise you can end up with cold cherries or raw batches of batter in the finished recipe.
If you’re making a recipe that will bake for an extended period of time (think: cherry cobbler, cherry pie, cake, quick breads, or muffins), you don’t usually need to thaw frozen cherries before using them.
With that being said, it’s a good idea to toss the frozen cherries in a spoonful of flour or cornstarch before using in a recipe. Frozen cherries can release a lot of liquid when cooked, which can sometimes cause soggy baked goods!
Also, when baking with frozen cherries, you might need to add a few extra minutes to the total bake time. The temperature of the batter or dough is lower when adding frozen cherries than if you used fresh cherries – that means they’ll need more time in the oven.
Recipes Using Frozen Cherries
Now that you know how to freeze cherries, it’s time to start the difficult task of gobbling them all up! If you’re unsure what to do with frozen cherries, use the recipes below as inspiration.
Remember that quick-cooking recipes (like pancakes) require thawed cherries, while most baked goods (muffins, pies, crisps) will be fine if frozen cherries are used.
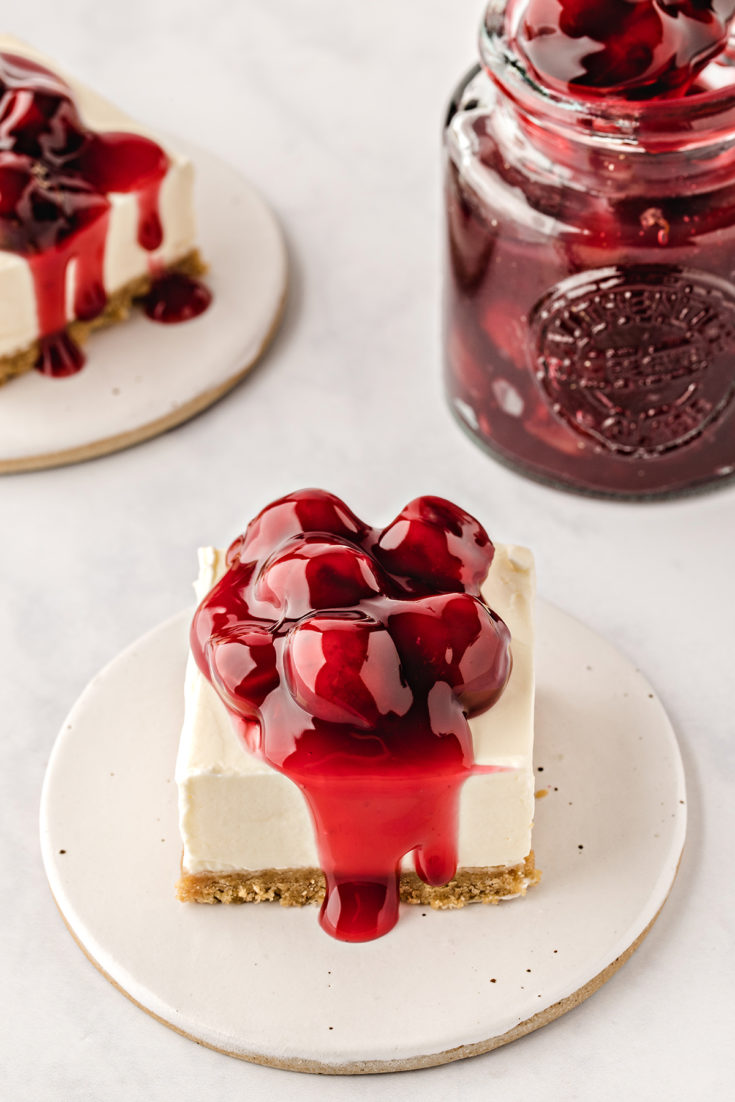
No-Bake Cherry Cheesecake Bars are made with a buttery graham cracker crust, creamy cheesecake filling, and cherry pie topping! It’s a quick and easy no-bake dessert that can be made the night before.
Homemade slushies like this recipe for a Cherry Limeade Slushie are perfect for summer and they're super easy to make!
I just made this Cranberry Cherry Mango Smoothie the other day using a new Ocean Spray Cran-Cherry juice. It was so tasty I just had to share!
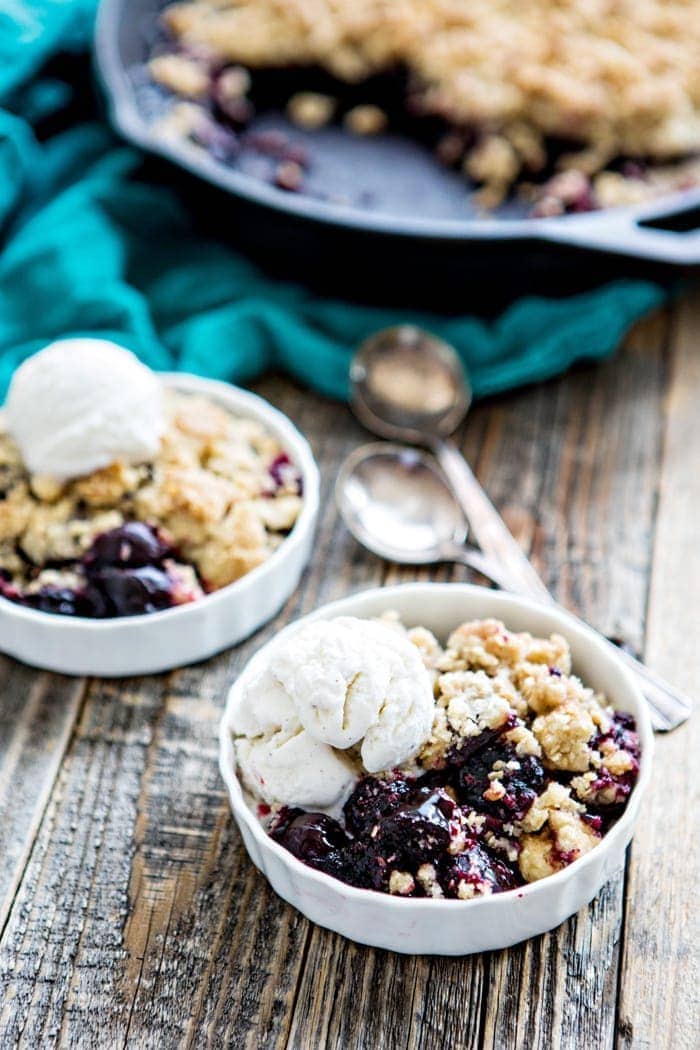
This Black Cherry Pomegranate Cobbler will remind you of summer camp cherry pie dump cake without the canned pie filling and box mixes. It features sweet black cherries with a hint of pomegranate and a generous helping of crunchy, golden brown, buttery cobbler topping.
These cute Cherry Vanilla Cupcakes have bits of real maraschino cherry in the bright pink Cherry Vanilla Buttercream. They're the perfect treat for Valentine's Day
Even with the streusel topping, these could be considered healthy muffins. The cherry really brightens up the zucchini.
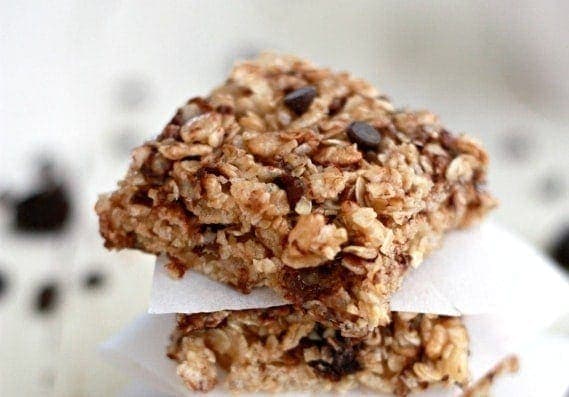
Simple, delicious SOFT granola bars made without any weird ingredients.
Cherry and chocolate are a perfect combination! The crunch of nuts really makes these interesting and I know your kids will love eating them for breakfast!
If you love grabbing a cherry limeade from the gas station or at happy hour, you'll love the flavor combo of these cupcakes!
This recipe for Cherry Oatmeal is flavored with cinnamon and vanilla, has tart dried cherries and almonds, and is super simple to make thanks to soaking the steel cut oats overnight! With a few minutes of prep work the night before, you can have a delicious bowl of overnight steel cut oats in less than 10 minutes for your morning breakfast.
Try This Tutorial for Freezing Cherries!
Next time you have an abundance of fresh cherries on hand, try freezing them for later!
Did you find this tutorial useful? Leave a comment below and give it a review for others to see what you thought.
On Instagram? Share your photo and tag me with @goodlifeeats and #goodlifeeatsrecipes. I’d love to see a photo of your frozen fresh cherries!
More Easy Freezing Tutorials:
Freezing raspberries is a wonderful way to enjoy summer’s harvest year-round! This guide explains how to freeze raspberries, plus it answers the most commonly asked questions about thawing frozen raspberries and using them in recipes.
Learn how to freeze blueberries, plus get answers to FAQs about thawing frozen blueberries and using them in recipes.
This guide explains how to freeze strawberries, plus it answers the most commonly asked questions about thawing frozen strawberries and using them in recipes.
Freezing tomatoes is the perfect way to preserve them for using in soups and sauces year-round. This post will explain the best way to freeze tomatoes, whether or not they should be blanched before being frozen, and more!
Who doesn’t love a good kitchen tip? Looking for more kitchen tutorials? Check out the entire Kitchen Tips and Tricks archive for lots of great ideas!
Stay Inspired in the Kitchen!
Want more delicious recipes, kitchen tips, and meal inspiration? Sign up for the Good Life Eats Newsletter and get:
✔ Tried-and-true recipes—from quick weeknight meals to special occasion favorites.
✔ Seasonal meal ideas—helping you make the most of fresh, in-season ingredients.
✔ Time-saving kitchen tips—boosting your confidence and creativity in the kitchen.

How to Freeze Cherries
Freezing fresh cherries is the perfect way to take advantage of sale prices and enjoy the taste of summer all year round!
Ingredients
- 1 pound Fresh cherries (any variety)
Instructions
Clean the Cherries
- At minimum, fresh cherries need a really good rinsing with tap water before freezing.
Dry the Cherries
- Cherries need to be completely dried after cleaning for best results, or they can develop freezer burn. I like to lay them on a dry, clean dish towel after draining them and let them air dry.
Pit the Cherries (Optional)
- Carefully work a paring knife around the flesh of the cherry, like you would to cut a peach in half.
- Twist the two halves of the cherry apart.
- Pluck the cherry pit out with your fingers.
Tip: A paring knife is just one method for pitting cherries. Here are the many other ways to pit cherries — use whichever method is easiest for you!
Freeze the Cherries
- Rinse and dry the cherries thoroughly, as instructed in the section above.
- Pit the cherries using whichever method is easiest for you. This step is optional, but highly recommended. If not pitting the cherries, skip this step and leave them whole.
- Lay the cherries in a single layer on a parchment-lined baking tray (tip: How to Line Pans with Parchment Paper). Cherries should be in a single layer so they don’t freeze in a big clump.
- Freeze until hard, about 1 hour.
- Transfer the cherries to your preferred freezer bag or freezer container.
- Label, date, and freeze for up to 1 year.
Nutrition Information:
Yield: 6 Serving Size: 1Amount Per Serving: Calories: 48Total Fat: 0gSaturated Fat: 0gTrans Fat: 0gUnsaturated Fat: 0gCholesterol: 0mgSodium: 0mgCarbohydrates: 12gFiber: 2gSugar: 10gProtein: 1g
GoodLifeEats.com offers recipe nutritional information as a courtesy. This provided information is an estimate only. This information comes from online calculators. Although GoodLifeEats.com makes every effort to provide accurate information, these figures are only estimates.









Leave a Comment