Artisan Pizza Dough
This slow rise Artisan Pizza Dough bakes up with a crispy, chewy crust and airy crumb. It’s the best pizza dough for make-ahead nights. Easy to stretch, deeply flavorful, and perfect for homemade pizza!
Why You’ll Love this Recipe
✔ Inspired by Neapolitan Style Pizza Dough: When baked, the crust has a soft interior, charred edges, and big bubbles. It delivers serious Italian pizzeria vibes.
✔ Simple Pizza Dough from Scratch: No mixer, no fuss. With just a few basic ingredients, this high hydration dough is easy to mix, fold, and shape by hand.
✔ Great for Make-Ahead Pizza Nights: Make this overnight pizza dough and refrigerate it for up to 2 days. Perfect when you want to prep ahead for an easy dinner.
✔ Crispy, Chewy Texture: Thanks to the pizza dough hydration and long fermentation, the crust gets a golden bottom, chewy bite, and light, airy crumb.
About this Recipe
Growing up, my dad would sometimes make homemade pizza and let us all build our own. We’d lay out the toppings and each pick exactly what we wanted. It felt like such a treat compared to ordering in, and honestly, it was a lot more fun too.
That’s something Kevin and I have carried into our own family traditions. Over the years, it’s become one of our favorite things to do with the kids. Sometimes we invite close friends over and turn it into a group pizza night. Everyone brings a few toppings, I make the dough, and we all gather in the kitchen. It’s casual, a little chaotic, and always a good time.
We’ve tested a lot of pizza dough recipes through the years. Some quick yeast versions, flatbread-style crusts, even the Artisan Bread in Five Minutes a Day method. A few were good, but none of them gave us the texture we were looking for.
I’ve always loved the kind of crust you get with a great Neapolitan-style pizza. It’s crispy on the outside, soft and chewy in the middle, with just enough char and those big, airy bubbles that make every bite feel a little special.
This artisan pizza dough is everything we’ve been chasing in a chewy pizza dough recipe. It’s the one Kevin and I both agreed was our favorite, and it’s officially become our go-to.
What I love most is the texture. The crust bakes up beautifully crisp with just the right amount of char, while the inside stays soft and full of air pockets. It feels like something you’d get from a pizza oven, but it’s surprisingly easy to make at home.
Instead of using a full packet of yeast, this recipe relies on a long, slow fermentation with just ¼ teaspoon of active dry yeast. That slower rise builds deeper flavor and a much better structure.
It also uses a higher ratio of water to flour than most doughs, which creates a soft, elastic dough that’s easy to shape. No rolling pin needed! Just a simple hand stretch and it practically forms itself. Smooth, flexible, and easy to work with from start to finish.
This post may include affiliate links. As an Amazon Associate and member of other affiliate programs, I earn a small commission from qualifying purchases.
This post may include affiliate links. As an Amazon Associate and member of other affiliate programs, I earn a small commission from qualifying purchases.
The Science Behind Artisan Pizza Dough: Why This Recipe Works
This isn’t your average yeast dough. The crispy, chewy pizza crust and soft, airy interior come from a slow, thoughtful method rooted in dough science. Here’s why this Neapolitan style dough recipe works so well:
Autolyse
Letting the flour and water rest for 20 minutes before adding anything else allows the dough to hydrate fully. This step kickstarts gluten development without kneading and makes the dough smoother and more elastic, an especially useful technique in high pizza dough hydration recipes.
High Hydration Dough (Around 75%)
This dough uses about 75% hydration, which is higher than other pizza dough recipes I’ve made in the past. That extra water helps the enzymes and yeast work more efficiently, creates an open crumb, and contributes to that light, chewy texture and blistered crust you’d expect from a Neapolitan style pizza dough.
Delayed Salt Addition
Salt is added after the autolyse phase to avoid interfering with gluten development. This small delay helps strengthen the dough, making it easier to stretch and fold. The result is a strong, workable dough that’s ideal for shaping by hand.
Long, Slow Fermentation (6 to 48 Hours)
This is a slow rise pizza dough that’s flexible with timing. Start it in the morning to bake by dinner, or let it ferment overnight (or even longer) for deeper flavor. The extended fermentation gives the yeast and enzymes time to build structure, improve digestibility, and create that classic chewy crust. No sugar or additives needed!
Baking on a Preheated Surface
Baking directly on a preheated pizza steel or stone mimics the intense heat of a wood-fired oven. That blast of heat causes the dough to puff up quickly, locking in steam and setting the crust. You’ll get a blistered bottom, crisp edges, and a perfectly chewy center.
Tools You’ll Need
You’ll need a few kitchen tools to prepare this recipe. Here’s what I recommend having on hand before getting started:
- Large Mixing Bowl: Big enough to mix and fold your dough comfortably by hand. This dough grows quite a bit, so a roomy bowl is a must.
- Digital Kitchen Scale: Precision matters here. A scale helps you get the right flour-to-water ratio for that chewy, airy crust.
- Bowl Scraper or Silicone Spatula: Great for folding the dough without sticking and for making sure you don’t leave any behind in the bowl.
- Fine Mesh Strainer: Perfect for lightly dusting your pizza peel. It gives an even layer without clumps.
- Pizza Peel: Essential for sliding your pizza onto a hot baking surface. A rimless baking sheet works well if you don’t have a peel.
- Pizza Stone: Heat-retaining surface that gives you that artisan-style crispness and help with oven spring. Preheat well for the best texture.
Artisan Pizza Dough Ingredient Notes
This dough is made with just a few simple ingredients. Here’s a closer look at what you’ll need to prepare this recipe.
Don’t forget to check the printable recipe card at the bottom of the post for exact measurements and step-by-step instructions.
For the Pizza Dough
- 00 Flour: This is my go-to for artisan pizza dough. It’s ultra-finely milled, easy to stretch, and bakes up with a soft interior and crisp bottom. It gives you that bubbly, airy texture you’d expect from a wood-fired crust. If you don’t have 00 flour, all-purpose works too (see below for the comparison).
- Warm Water: Hydrates the flour and activates the yeast. The 75% hydration is what gives this dough its soft texture and chewy crumb.
- Active Dry Yeast: The long fermentation builds flavor and structure without needing much yeast at all.
- Fine Sea Salt: Added after the autolyse to strengthen the dough and enhance both flavor and fermentation control.
For Prepping the Pizza Peel
In addition to the dough ingredients, you’ll also need a little extra flour and either semolina or cornmeal for prepping your pizza peel.
- Flour (00 or all-purpose): Used for dusting the peel and work surface.
- Semolina or Cornmeal: Adds lift and texture, helping the dough slide easily onto the hot baking surface.
Types of Flour for Artisan Pizza Dough
You can use either one for this pizza dough, but they behave a little differently. Here’s how they compare:
All-Purpose Flour: This flour is easy to find and super versatile, and you likely already have it in the pantry. It creates a nice balance of chew and stretch in pizza dough. The result is a slightly thicker, more rustic crust that still bakes up well.
00 Flour: This Italian-style flour is finely milled to feel almost like baby powder. It’s commonly used in Neapolitan-style pizza for its soft, chewy interior and crisp bottom. It’s ideal if you want that soft, bubbly artisan feel.
Semolina Flour (For the Peel): Semolina is often used to dust a pizza peel because its coarse texture helps the dough slide off easily onto a hot surface. It creates just enough friction to prevent sticking without affecting the crust. If you don’t have semolina, cornmeal works well too and helps with releasing the dough from the pizza peel.
So which one should you use? I usually reach for 00 flour. It’s my favorite for that classic chewy texture and crisp finish. But if all-purpose is what you’ve got, it still works fine. You’ll get a slightly more rustic result, but the crust will still be flavorful, bubbly, and satisfying.
Check out this guide if you want to learn more about the Different Types of Flour and Their Uses.
How to Make Artisan Pizza Dough
This artisan pizza dough might look fancy, but it’s surprisingly simple to make. The process is mostly hands-off and works great as a make ahead pizza dough. Perfect for low-stress pizza nights when you still want that crispy, chewy crust. Here’s a quick overview:
- Mix and Rest (Autolyse): Combine the flour and most of the water in a large bowl. Let it rest for 20 minutes to begin gluten development naturally—no kneading needed.
- Add Salt and Yeast: Stir in the dissolved yeast and salt using gentle folds and pinches. Mix until fully incorporated, then let the dough rest again.
- Fold and Bulk Ferment: Give the dough one set of folds to strengthen it, then let it rise at room temperature until doubled in size.
- Divide and Shape: Cut the dough into two portions and shape each into a ball. Let them rest again or refrigerate for later use.
- Stretch, Top, and Bake: Gently shape the dough by hand, add your toppings, and bake on a preheated surface until the crust is golden, blistered, and crisp on the bottom.
The above is simply a quick summary of this chewy pizza dough recipe. Check out the full recipe in the free printable recipe card at the bottom of this post for all the detailed instructions.
Tips for Making the Best Pizza Crust
- Use a kitchen scale if you can. This dough is all about hydration balance, and weight measurements give the most consistent results.
- Dampen your hands for folding. High-hydration dough can be sticky, especially at first. Lightly wet hands make the folding process easier and less messy.
- Preheat your oven and baking surface thoroughly. A pizza stone makes helps achieve that blistered, crisp bottom crust. Give it at least 45 minutes to fully heat up.
- Be gentle when shaping. The dough is full of air bubbles, so avoid pressing too hard or over-handling. Let gravity help stretch it into shape.
- Dust your pizza peel with a mix of flour and semolina flour (or cornmeal). This combo helps prevent sticking and makes it easier to slide the pizza onto a hot surface. A fine mesh sifter keeps the layer light and even.
- Always check that the dough moves on the peel before baking. A quick little jiggle before adding toppings helps you avoid any pizza-sticking disasters. If it sticks, lift a corner and dust more flour underneath.
- Give your stone or steel plenty of time to heat. Your oven might say it’s preheated, but the stone takes longer to fully absorb that heat. Let it continue heating for at least 45 minutes after the oven beeps.
Troubleshooting Tips
The dough didn’t rise much. Did I do something wrong?
If your kitchen is on the cooler side, it might just need a little more time. Try letting it rise in a warmer spot.
Inside the oven with the light on, near a sunny window, or tucked into a turned-off microwave. If you see some bubbles and it feels puffier, you’re on the right track.
My dough feels too sticky. What should I do?
A little stickiness is totally normal with high-hydration dough. Try lightly wetting your hands during folding or using a bowl scraper to help move it around.
When shaping, use a floured surface, but avoid adding too much flour, or it can change the texture of the final crust.
Another helpful trick? Let the dough chill after the final rise.
This is one reason I prefer making this pizza dough ahead of time instead of the day of. Cold dough is easier to handle than room temperature dough, especially when shaping.
The dough seems too loose and hard to shape.
If it’s extremely slack, it may just need one more set of folds during bulk fermentation, or it might be slightly underdeveloped. Don’t worry! Shape gently and try using a smaller portion of dough if needed.
You can also pop the dough in the fridge for a bit after the final rise. Chilling it firms up the dough slightly and makes it much easier to stretch and shape without tearing.
It’s sticking to the pizza peel!
This is a common one, and it’s an easy fix. Before shaping your dough, make sure your pizza peel is dusted with a mix of flour and semolina flour (or cornmeal). Here’s why that combo works so well:
- Flour absorbs moisture. A thin layer of flour helps wick moisture away from the dough, especially right after shaping. It creates a dry, even base that prevents sticking.
- Semonila Flour or Cornmeal add lift and friction. The coarse texture acts like tiny ball bearings, making it easier to slide the pizza off the peel and onto a hot surface.
- Together, they give you balance. Flour alone can clump. Semolina flour (and cornmeal) alone can feel gritty. But the combo keeps things smooth and easy to move. A fine mesh sifter helps keep the layer nice and light.
Also, always give the dough a little jiggle before adding your toppings. If it doesn’t move freely, lift a corner and dust underneath to prevent trouble later.
My crust didn’t get crispy on the bottom.
This usually means the oven or baking surface wasn’t hot enough. Make sure to preheat your steel for at least 45 minutes. That high, consistent heat is key for a crisp bottom crust and good oven spring.
The crust burned on top before the bottom was done.
If you’re using the broiler, make sure your pizza isn’t too close to the heat. You can also lower the oven rack slightly next time, or reduce broil time by a minute or two. A balance of top and bottom heat is key to getting it just right.
FAQs
Got questions about how to make this recipe? Here are the answers to a few commonly asked questions. Feel free to leave any other questions in the comments on this post and I’ll respond with answers.
What’s the best flour to use?
I usually use 00 flour for a more traditional Neapolitan-style texture, but it’s totally optional. You can use all-purpose flour and it will work just fine, just make sure to weigh your flour.
Do I need a stand mixer for this recipe?
Nope! This dough is designed to be mixed by hand using folds and pinches. It’s incredibly forgiving and doesn’t require kneading. Just a little hands-on folding and resting.
Can I make this dough ahead of time?
Yes! After shaping the dough into balls, you can refrigerate it for up to 2 days. I love doing this the night before or even two days ahead.
When pizza night rolls around, all you have to do is shape, top, and bake. No need to let it come to room temperature first.
Do I need a pizza steel or stone?
They definitely help with a crisp bottom crust and better oven spring, but they’re not absolutely required. You can also use a large baking sheet or a pizza pan (as long as it isn’t the type with holes in the bottom).
Do I Really Need to Preheat My Pizza Stone for 45 Minutes?
Yes! And here’s why: Your oven might reach 550°F quickly, but the stone or steel takes longer to absorb and hold that heat.
If you bake too soon, the crust won’t crisp properly on the bottom.
Give the stone a full 45 minutes after the oven is preheated so it’s thoroughly hot. It’s the secret to blistered edges, chewy texture, and an airy crumb.
Can I make individual pizzas with this dough?
Absolutely! This recipe makes two large pizzas, but you can divide it into 3 or 4 smaller portions so everyone can top their own. It’s great for family pizza night or a make-your-own-pizza dinner with friends.
Can I cook this on the grill?
Yes! Place your pizza stone inside the grill and heat it to the same temperature you’d use in the oven. Let the stone preheat for an extra 15 minutes so it gets fully hot.
Once the pizza is on the stone, shut the lid. Then cook, just like you would close the oven door.
Pizza Toppings to Try
Now that you know everything you need to make the perfect artisan pizza dough, it’s time to top it! Here are some of my favorite pizza toppings to try:
Here are some of my favorite pizza toppings:
- Homemade marinara sauce, arrabbiata sauce, or vodka sauce – all make great pizza sauces!
- Alfredo sauce – perfect for a white pizza
- Chile garlic oil – for a spicy olive oil-style base
- Spicy Italian or Fennel sausage
- Prosciutto
- Fresh basil
- Caramelized onions
- Roasted garlic
- Fresh heirloom tomatoes
Looking for full pizza recipes to get started? Check out these crowd-pleasing pizza recipes are perfect for testing out your freshly baked crust. Need more inspiration? You can also browse all of the pizza recipes through the Recipe Index.
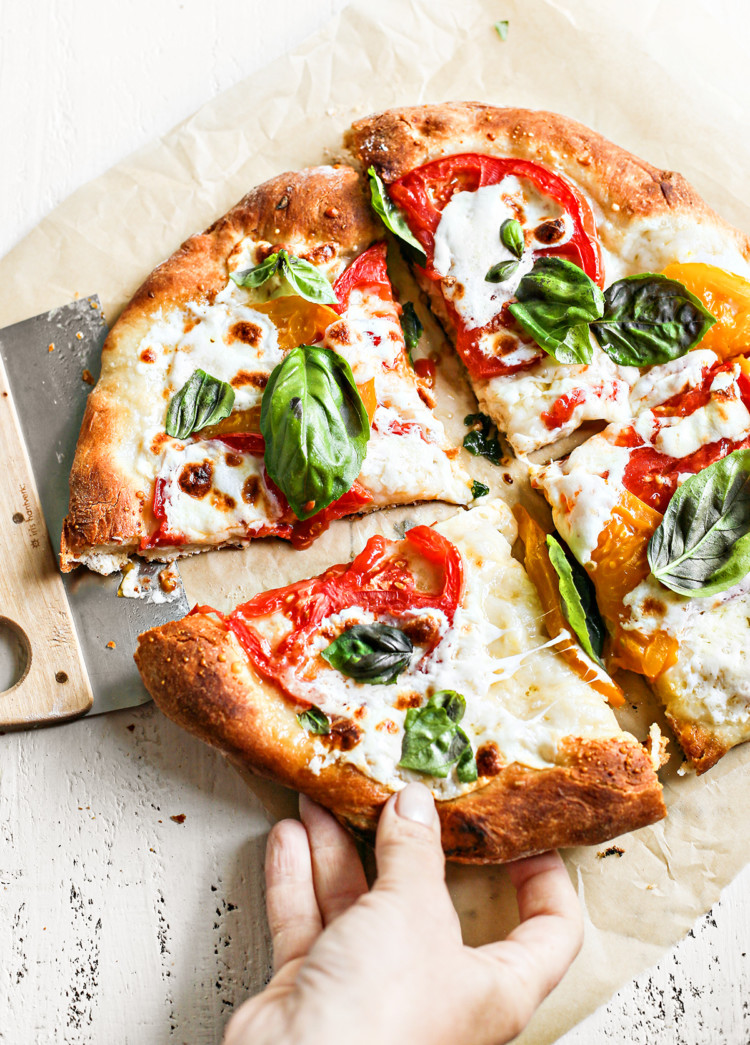
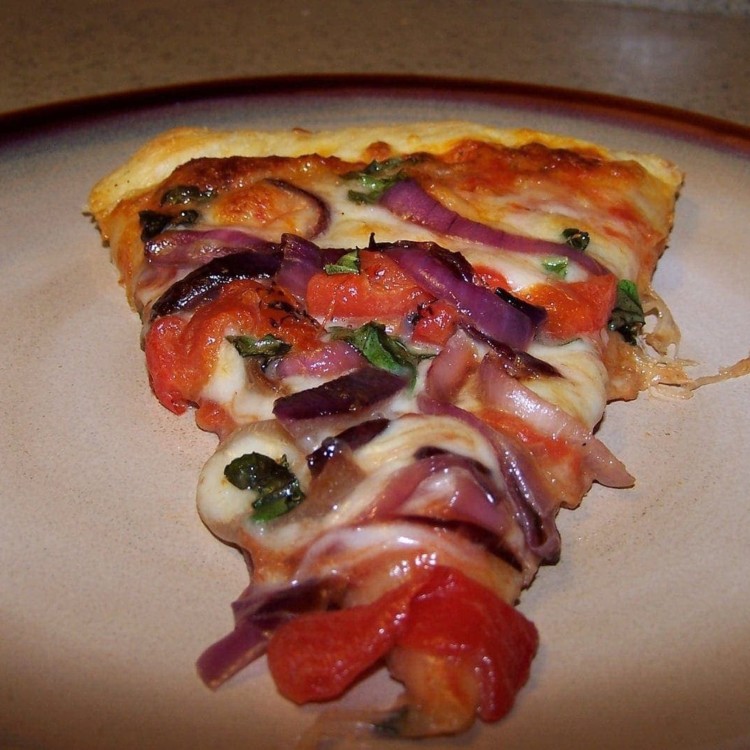
Caprese Pizza
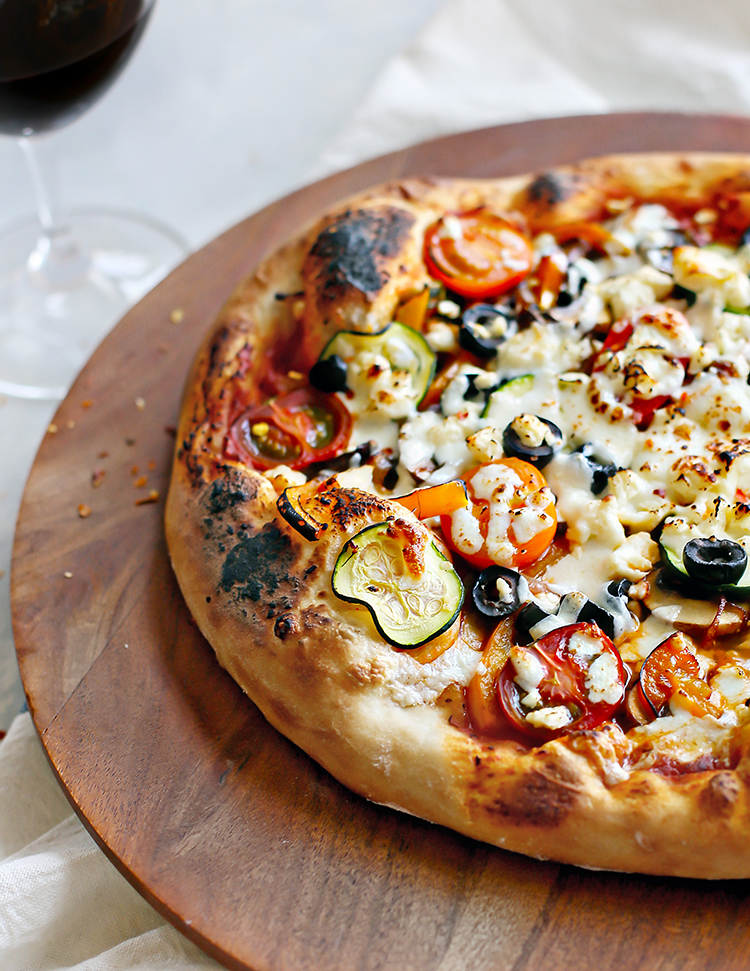
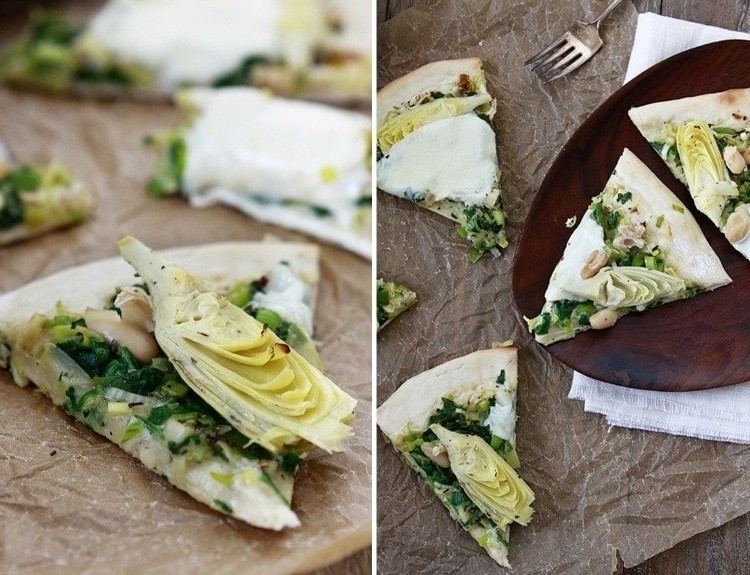
Vegetarian Supreme Pizza

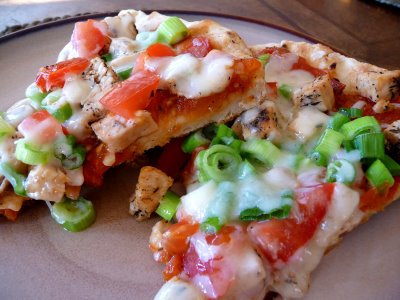
BBQ Chicken Pizza
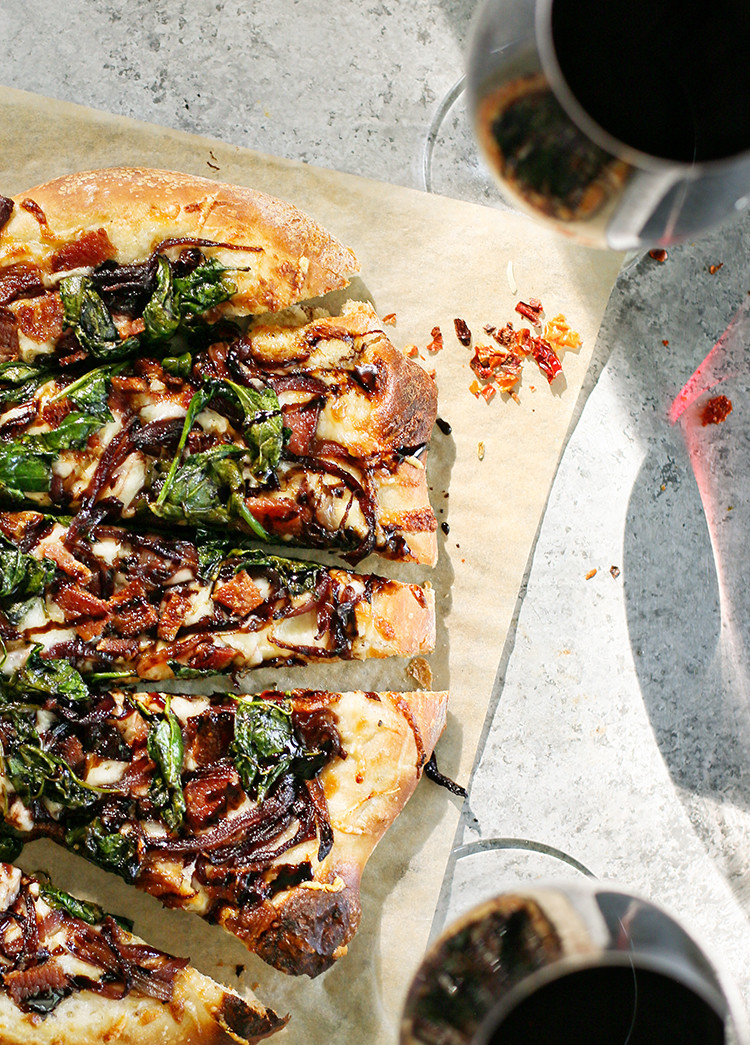
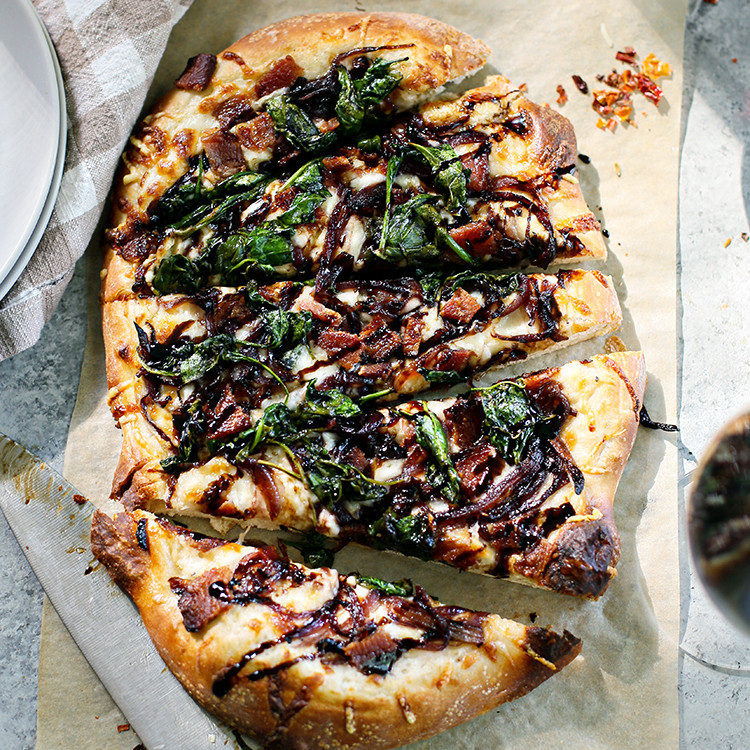
Caramelized Onion Bacon Pizza
Stay Inspired in the Kitchen!
Want more delicious recipes, kitchen tips, and meal inspiration? Sign up for the Good Life Eats Newsletter and get:
✔ Tried-and-true recipes—from quick weeknight meals to special occasion favorites.
✔ Seasonal meal ideas—helping you make the most of fresh, in-season ingredients.
✔ Time-saving kitchen tips—boosting your confidence and creativity in the kitchen.
Artisan Pizza Dough Recipe
Ingredients
For the Artisan Pizza Dough
- 500g 00 flour
- 375g warm water, divided
- ¼ teaspoon active dry yeast
- 1 ¾ - 1 ⅞ teaspoons fine sea salt, depending on preference
For Prepping the Pizza Peel
- 00 flour or all-purpose flour
- Cornmeal or Semolina flour
Instructions
Making the Artisan Pizza Dough
Mix the Flour and Water (Autolyse Phase)
- In a large mixing bowl, combine the flour with all but 1 tablespoon of the warm water.
- Stir with a spoon or your hands until no dry spots remain. The dough should look rough and shaggy.
- Cover the bowl and let it rest for 20 minutes. This rest (called the autolyse) helps the flour absorb water and starts building gluten naturally, without kneading.
- While the dough rests, sprinkle the yeast over the reserved tablespoon of warm water in a small bowl and let it dissolve.
Add Salt and Yeast + Mix Gently by Hand
- Uncover the bowl and sprinkle the salt evenly over the surface of the dough.
- Stir the dissolved yeast, then pour it over the dough as well.
- Lightly dampen your hand to prevent sticking.
- Reach under the dough, stretch a section upward, and fold it over the top. Rotate the bowl and repeat this stretch-and-fold motion 4–5 times.
- Grab a handful of dough and squeeze firmly, letting it press between your fingers. Repeat this squeezing motion in several spots around the bowl to help evenly incorporate the salt and yeast.
- Once that’s done, go back to the stretch-and-fold motion—lift and fold the dough over itself a few more times until it looks a bit smoother and more cohesive.
- Cover the bowl again and let it rest at room temperature for 1 hour.
Final Fold + Bulk Fermentation
- After resting, give the dough one more set of folds.
- Wet your hand again. Lift one side of the dough, stretch it upward, and fold it over the center.
- Rotate the bowl and repeat this 4–5 more times until the dough tightens up into a soft ball.
- Transfer the dough to a clean, lightly greased bowl with the smooth side facing up.
- Cover and let it rise at room temperature for 5–6 hours, or until it’s about doubled in size and has visible bubbles.
Divide and Shape into Dough Balls
- Lightly flour your work surface and turn the dough out gently. Cut it in half with a bench scraper or knife.
- To shape each dough ball: Gently stretch one side of the dough outward, then fold it into the center. Rotate the dough a quarter turn and repeat.
- Continue stretching and folding from four sides—like folding in from the top, bottom, left, and right—until you’ve formed a loose ball.
- Flip the dough over (seam-side down) onto an unfloured area.
- Cup your hands around it and gently pull it toward you to tighten the surface. Rotate and repeat until the top feels smooth and taut.
- Place the shaped dough balls on a lightly greased plate.
- Lightly oil the tops, cover loosely, and let them rest at room temperature for 1 hour.
- If you’re not baking right away, wrap tightly and refrigerate for up to 2 days. Cold dough is easier to handle and develops even better flavor.
Baking the Pizza
Preheat Your Oven and Baking Surface
- Place a pizza stone or baking steel on the middle oven rack. Preheat your oven to 550°F (or as high as it will go).
- Once the oven reaches full temperature, continue preheating the stone for at least 45 minutes. This extra time ensures the surface is fully saturated with heat and ready to give the crust that crispy bottom and airy rise.
- While the oven heats, generously flour a pizza peel (or a rimless baking sheet if using that instead). You can also use a mix of flour and semolina or cornmeal to help prevent sticking.
Shape the Dough
- Lightly dust the counter with a thin layer of flour. Place one dough ball on a floured surface. Flatten the center into a wide disk, leaving a 1-inch border untouched.
- Pick up the dough by the edge and let gravity gently stretch it into a 12-inch round. Avoid over-stretching. Just rotate and support the dough as needed.
- Using a fine mesh sifter, lightly dust the peel with a thin layer of flour. Then sift a second light layer of semonila flour or cornmeal right over the top. This combo helps prevent sticking and makes it much easier to slide the pizza onto a hot surface. Set aside.
- Lay the shaped dough onto your prepared pizza peel and adjust the shape as needed.
- Important: Give the peel a little jiggle. If the dough sticks, lift a corner and dust more flour or semolina flour/cornmeal underneath.
Add Toppings and Bake
- Spread your sauce and toppings on the dough, keeping the edge clear.
- Carefully slide the pizza onto your preheated surface and bake for 5 - 7 minutes.
- Then switch on the broiler and broil for 1 - 3 more minutes, just until the crust is golden and bubbly and the cheese is melted.
Nutrition Information:
Yield: 4 Serving Size: 1Amount Per Serving: Calories: 1Total Fat: 0gSaturated Fat: 0gTrans Fat: 0gUnsaturated Fat: 0gCholesterol: 0mgSodium: 929mgCarbohydrates: 0gFiber: 0gSugar: 0gProtein: 0g
GoodLifeEats.com offers recipe nutritional information as a courtesy. This provided information is an estimate only. This information comes from online calculators. Although GoodLifeEats.com makes every effort to provide accurate information, these figures are only estimates.


Leave a Comment